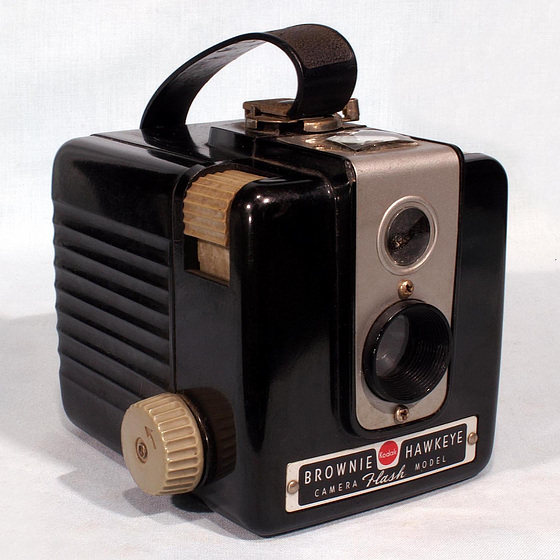
This is what a clean, ready to use Kodak Brownie looks like. Yours can be just as spiffy by reading this article and following the fountain of youth rejuvenating process for your Kodak Brownie Hawkeye or Kodak Brownie Hawkeye Flash model.
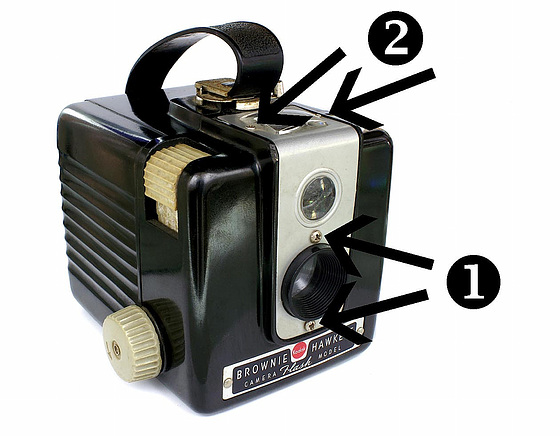
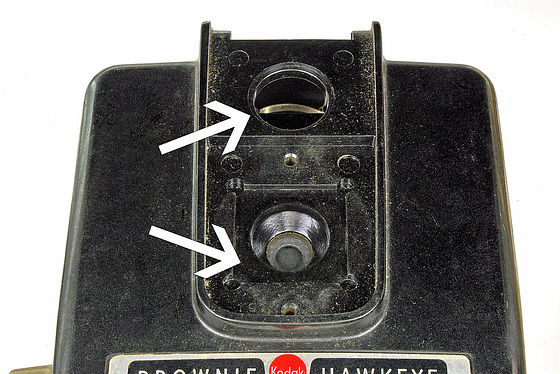
The first thing I always do is to remove the two shorter screws described as number 1 in the picture above. Once they are out, I then remove the two long ones at the top, number 2 on either side of the viewfinder lens. Sometimes they will be very easy to remove, and sometimes they will seem quite stuck and impossible. Or anything in between. But, perserverance will reward you once you have all four removed.
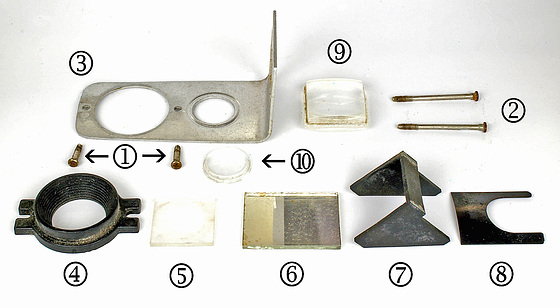
Once you have all four screws removed, you can take everything off the front of the camera and lay it out in preparation to giving each piece a good cleaning. These are the pieces you should have:
1. 2 shorter screws from the front of the camera.
2. 2 longer screws from the top of the camera.
3. The aluminium face plate.
4. The plastic lens shield.
5. The square glass plate protecting the internal lens from dust.
6. Viewfinder mirror.
7. Viewfinder top lens holder.
8. Viewfinder spacer.
9. Top viewfinder lens.
10. Front viewfinder lens.
Now, a couple things you'll need to remember for when you put everything back together. I almost always forget to put in the little square piece of glass before I put it back together, so don't forget it! The spacer in the viewfinder is curved and the open side of the curve points backwards with the arch-shaped opening pointing down. The top viewfinder lens is flanged differently on the top than on the bottom. Just remember that the smaller flange goes up, through the aluminium faceplate piece and the larger flange will fit down into the mirror assembly area. And when putting it all back together, the front viewfinder lens is flat on one side and curved on the other. The flat side goes backwards, toward the viewfinder assembly area and the curved side points forward.
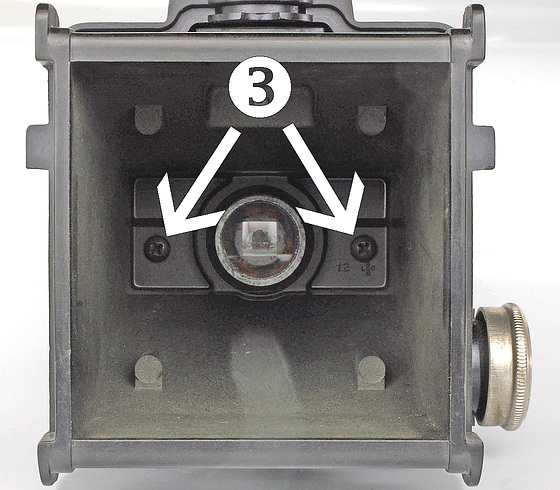
By now, you have all the pieces from the front of the camera removed, cleaned and waiting to go back together. Now it's time to remove the actual lens inside the camera so you can give it a good cleaning as well. Once you remove the back of the camera you will be able to look inside and see two screws, to the left and right of the lens. Remove both of these.
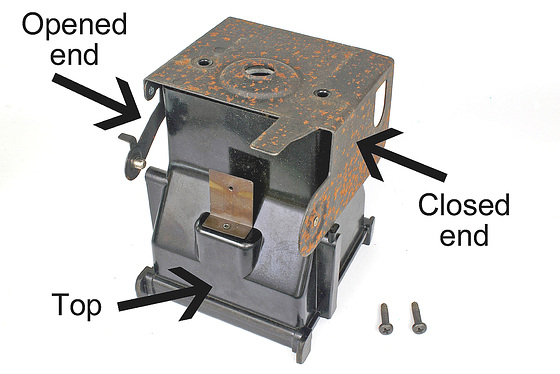
Once you have removed the two screws holding the lens assembly to the body of the camera, you can gently pull out the entire piece. Be sure to note how it looks after you pull it out because the metal piece has to go back on in a certain direction. There is one side that is mostly metal and the other side has little arms that hold the ends of both spools of film. The closed end is the side which joins up with the winding knob on the outside, while the open end is on the same side as the knob that is lifted up and allows for bulb or timed exposures. When you put it all back together after it has been cleaned, if you see through the lens opening without any obstructions, you have it correct. If part of the lens opening is covered over with the metal plate, you have the plate on upside down. The difference between the two is quite noticeable.
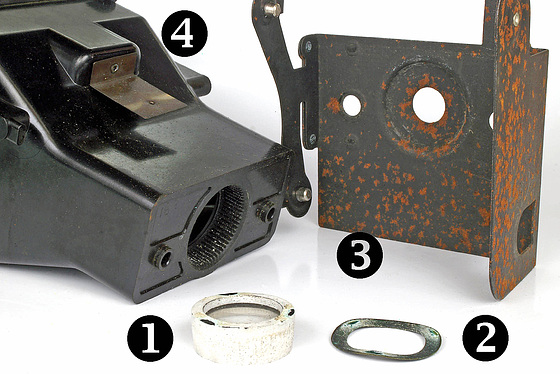
Once you have the lens assembly out and the screws in the metal plate removed, it will detach fairly easily. As you take it apart, be sure to look for a wavy spacer and the lens to fall out. There has always been marks on my cameras where the spacer has rested against the lens. This will help when you put it back together to know which way the lens goes. But, just in case you forget, there is an upcoming picture that will clearly show the proper lens placement.
Be sure to clean this lens real well because this is what will insure that your pictures turn out clear and without any fogging. 50 year old cameras are notorious for acquiring a coating of dust, dirt and smoke buildup and this is what gives your pictures a ghostly haze to them. Once the lens is free from any dirt, as well as the square glass piece from the front of the camera, you will have a totally clear view for your camera to expose whatever type of film you prefer.
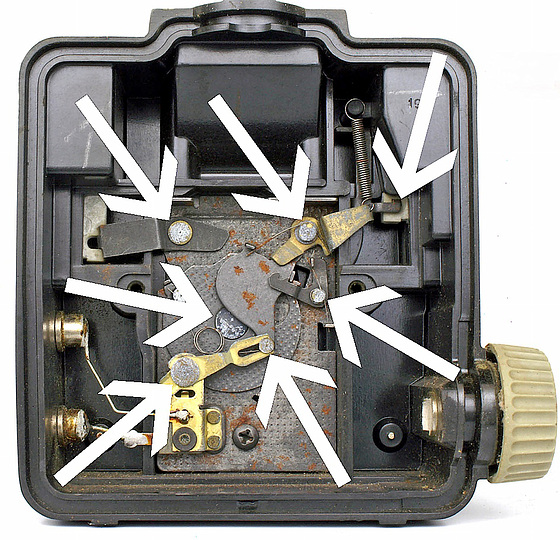
While you have your camera apart, you might as well oil a few of places that might be causing the shutter to either hang up entirely or drag and work slower than it should. This will cause it to have a slower shutter speed, which leads to blurred images. I have indicated the 7 points that should get lubricated. Keep in mind that only 6 should get actual oil while the center circle assembly should get graphite. It is the metal piece about the size of a quarter indicated by the arrow on the left/middle area pointing to the right.
Be sure to use regular oil and not a lubricant such as penetrating oil or WD-40. Those types of lubricants will dissolve whatever original oil remains and then evaporate, leaving no lubrication at all. Also be sure not to use too much oil on each point, perhaps put it on using a toothpick or similar pointed object. After all the points have been oiled, dab away all the excess oil with a paper towel. That way there will be no chance of it dripping anywhere it shouldn't.
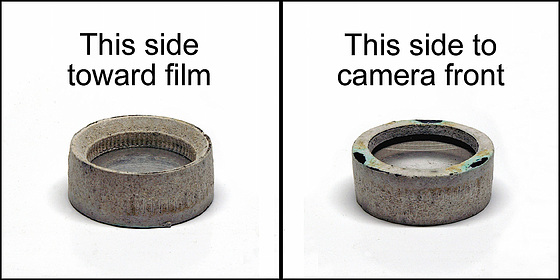
This shows the proper placement position for putting your cleaned lens back in the camera. One side has flat edges and this goes forward. You might be able to recognize this side from the wavy washer imprints it might still possess. The side with a bevelled edge is the side that points back toward the film.
Some people have reported interesting results by reversing the lens. If you want your Brownie Hawkeye to perform in the normal manner, put it back like it came apart. But, if you have a spare Brownie Hawkeye, you might want to experiment with it and reverse the lens direction for some cool effects. Pictures that I've seen taken with the lens reversed produce an image where there is a "sweet spot" of good focus in the middle of the photograph with lots of blurriness around the edges. For certain subjects, it's a very interesting effect.
After every part has been thoroughly cleaned and is ready to reassemble, one last little tip for the front of the camera. I always forget to add in the little square piece of glass, so don't forget to do that yourself. When replacing the glass square, make sure you don't smudge it or the viewfinder lenses as you put them back in. Also make sure the mirror is clean and unsmudged, with the reflective side up. When placing the front viewfinder lens and square piece of glass, this picture shows the little grooves they fit in. This ensures that they always go exactly where they need to go. To get everything to stay in place while I'm reassembling it, I prop the back of it against something so that it's at about a 45 degree angle.
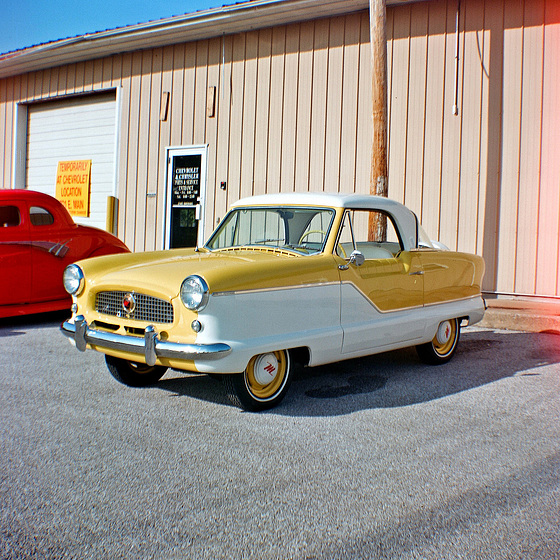
Once everything is clean, fitted back into place and screwed back together, you should have a camera that performs as good as the day it was made. And you can be proud to carry it around with you for all your photographic needs. I've found that my Kodak Brownie Hawkeye Flash cameras can produce some excellent pictures. Below is a picture I took in 2009 with a Kodak Brownie Hawkeye Flash camera made in 1957 and I acquired in 1977. You can see that they can still make some really nice images:
3 comments
HaarFager said:
Edit to add:
A 120 spool doesn't seem to want to fit in my Kodak Duaflex.
HaarFager said:
HaarFager said: